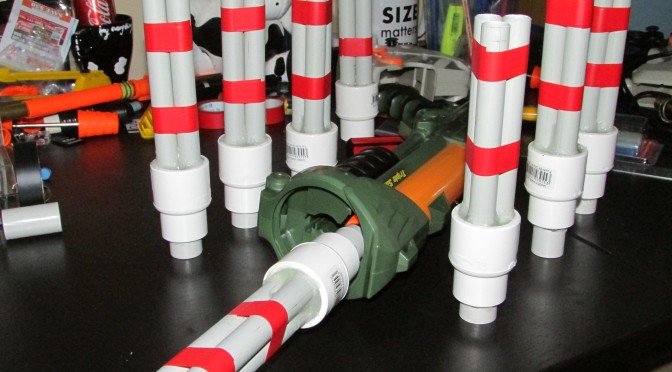
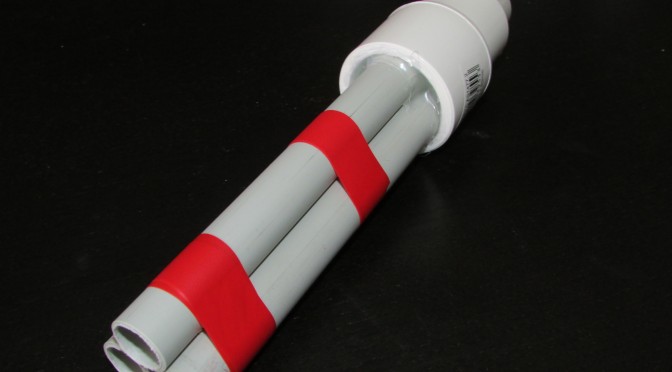
Making an Absolver Compatible Shotgun – Modification Write Up

Goals and Aims

Following up on the yesterday’s post detailing how to make an Absolver, I thought it was necessary to write another post on how to modify your blaster to use those Absolvers effectively.

This write-up will use the Tripleshot as an example to show the reader how to make full use of Absolvers.

Inputs and Tools required

  • A piece of 20mm conduit (5cm is a good length)
  • A Tripleshot Plunger Tube (or even a BBUMB if that’s what you want to use. The same principles of this guide still apply)
  • Qbond + Qbond black powder (or other adhesive that can create and airtight seal)
  • A Dremel with a grinding bit
  • Pipecutters
  • Personal Protection Equipment (Eye protection and gloves)

Modification Guide

Take note of the Absolvers: the piece that is intended to attach to the blaster is a 20mm conduit coupler. Logic would tell us that we need some 20mm conduit to attach it to!

Get yourself a piece of 20mm conduit. The first thing you’ll notice is that it does not fit over the lip of the TS plunger tube  or over the end of the black pipe on the BBUMB. The only solution is to grind down the inside of the conduit until it fits. Use your Dremel and grinding bit to get the job done. Be sure not to grind it down too much though, you want a good friction fit (The piece of conduit shouldn’t fall off if you let it go).

IMG_0443This is what it should look like when it’s done. Keep in mind that the Conduit is flush with the surface of the plunger tube.

IMG_0446The piece of conduit looks a bit long now, doesn’t it? This would create deadspace and deadspace isn’t good for your blasters. So get your pipe cutters and cut the piece of conduit down to about 3cm. I found this to be the best length to use that balances amount of deadspace and ease of loading and removing the Absolvers.

Now you need to secure the conduit to the plunger tube. I used Qbond and the black powder that acts as a filler and sealer. You could easily use epoxy or something, but if you’re going to use an alternative, make sure it’s a good adhesive. You want this to stick.

IMG_0448Be generous with securing the conduit – this piece is going to be pulled and twisted and tugged quite often considering what it’s for. Mine ended up looking like this.

IMG_0449With that done, you can now reassemble your TS (or BBUMB)! Do note, with the TS, I used a 13kg Spring nested in a stock Longshot spring. That will give you the 50ft you want.

Now you have a working Shotgun to use as a Commando!

Final Thoughts

This modification was even easier than making the Absolvers themselves. Most Nerfers will have no trouble following this guide.

From my experience, the loading is very smooth and quite easy. Commandos will be a force with this sort of blaster at their side.

IMG_0450To end this guide, here’s a test firing video of my Shotgun. Enjoy!

Echoes.


Making an Absolver – Modification Write Up

Goals and Aims

With Foam Fortress: Sydney gearing up, as well as the emergence of the Commando as a very viable Class, it’s about time we started having some proper Shotguns on the field. But you can’t really have a proper shotgun without Absolvers – multiple barrel attachments that allow your blaster to fire a volley of darts at once.

This write-up intends to help the reader construct a six-shot Absolver that will allow blasters like the Triple Shot and the BBUMB to reach 50ft flat (the maximum range for Shotguns in FF:S) with the entire spread.

Inputs and Tools required

  • 25-20mm PVC reducer
  • 20mm Conduit coupler
  • 45cm of 16mm conduit
  • Electrical Tape
  • Q-bond (Or other superglue)
  • Foam blanks or other suitable filler material.
  • Hotglue + Hotglue gun
  • Ruler
  • Marker
  • Pipe cutter
  • Scissors
  • Knife or blade
  • A cloth of some sort

Modification Guide

Step 1. The Cradle.

First, you’ll want to start work on the Reducer and the Coupler. The Reducer will act as a cradle of sorts for the three barrels while the Coupler will be used as the attachment point between the blaster and the Absolver itself. The aim here is to nest them into each other with the help of some Electrical Tape.

IMG_0421Wrap one end of the Coupler in Electrical Tape until it fits snugly into the 20mm section of the Reducer. The amount of tape might take some trial and error, but you’ll get it right eventually. Always apply a little extra, then remove what you don’t need from there.

IMG_0422Next, you’ll want to nest the two fittings so that they appear flush like in the picture below.

IMG_0423As you can see, the 20mm conduit Coupler is pretty much flush with the end of the 20mm section of the PVC Reducer.

With the two parts fitted together, we must ensure that they never come apart while you’re using them (It’s pretty important that these things stay together). Grab your superglue and drop some into the gap between the Coupler and Reducer. The electrical tape will create a platform for the glue to actually set on, holding the two pieces together.

IMG_0424Take note of that small gap visible in this picture. This is where you’ll be wanting to drip the superglue into.

Now that the superglue has cured (It really shouldn’t take any longer than 10 seconds for it to fully set), you can now seal the gap over to prevent any air escaping. Hotglue isn’t my favourite adhesive, but it was quick and easy and it really isn’t holding anything together. So just put some hotglue into and over the gap.

IMG_0429Now you’ve pretty much completed work on the “Cradle” for now. Next up, the barrels!

Step 2. The Barrels

This type of Absolver only allows for three 16mm conduit barrels. To maximise the performance and capacity of the absolver itself, we will use three 15cm long barrels so that we can load two stock sized darts per barrel for a six dart spread. Measure them out and cut them with a pipe cutter. Don’t forget to ream out one end of each barrel for easier loading and smoother firing.

IMG_0425Next, we need to tape these barrels together so that they hold their configuration. This way it’ll be much easier to fit all three into the Cradle at once. Apply a couple of wraps of tape at approximately the 7.5cm mark and the 12cm mark of the barrels. Make sure you wrap the tape on the reamed end of the conduit as shown below.

IMG_0428But before you go shoving your barrels into the Cradle, we need to seal an airhole that will render this whole setup useless. Flip the barrels over to the un-reamed end and you’ll see a sort-of-triangular shaped gap. This hole runs all the way through to the other side and if left there, will allow air to escape. This means no shotgun blast.

IMG_0430

Fill it with hotglue. No hole is going to stop us from Shotgun glory. Once the hotglue cures, cut away any excess with a blade.

IMG_0431IMG_0432


Your barrels are complete. Time to finish this Absolver!

Step 3. Combining the Cradle and the Barrels.

JAM THOSE MOFO’S TOGETHER (make sure you jam the un-reamed ends of the barrels into the cradle, not the other way around!). No seriously, you need to put a tiny bit of muscle into this. It’s a bit of a tight fit so you might need to use a bit of your weight to do it. I put a cloth over the top of the barrels and put the cradle onto my desk, then PUSHED them in. They should “creak” a little until they finally slot into place. Once they stop creaking, check to see that the un-reamed ends of the barrels are sitting almost flush on the end of the 25mm section of the Reducer. It’s hard to illustrate in a picture… mainly because my camera wouldn’t focus on it…

IMG_0433But this is how it should look once you’ve jammed the parts together.

Now it’s time to fill in some more gaps! As you can see in the picture above, there are some pretty big gaps between the Cradle and the Barrels. These massive gaps will act as passages for air to escape – again meaning no shotgun blast. So we’d better get something in there. Sounds like a job for hotglue! But first…

IMG_0435IMG_0436


I used a foam blank cut into quarters and just jammed 3 of those pieces into the holes. You could easily do the same with a stock dart. The reason I did this was to act as a base for the hotglue to sit on while it cured.

With the foam jammed in, it’s time to seal the holes shut with some generous amounts of hotglue. Make sure there are no gaps in the glue anywhere, and also go over the edges where the conduit barrels touch the sides of the Reducer.

IMG_0437Once the hotglue cures, you’re done! You now have one Absolver to use with your Tripleshot or BBUMB.

Final Thoughts

This “Mod” was fairly simple. It’s more a game of patience than skill in my opinion. Why is it a game of patience? Well because what good is ONE Absolver? You’ll probably need well over TEN to be any sort of effective in a game of Foam Fortress: Sydney. It becomes a matter of whether you can sit there and churn them out one by one until you get enough.

Testing with my BBUMB, there is definitely a fantastic spread and it does indeed reach the 50ft mark. These will make for great pieces of Equipment for the Commando.

Look out for a follow up write up of how to make your blaster compatible with these particular Absolvers.

IMG_0438Credits

Thanks to Cheyne “Nog” Lambert and Nick “BFG” McKenna for walking me through the design basics of this particular kind of Absolver. Also thanks to Craig “Blastedgnu” Berson and Raymond “Kat” Cheung for some additional information and insight into what materials I should be using and how I should be applying them. And thanks to Psychosis for the provision of the conduit.

Thanks for reading the write up, and I hope to see a few Commandos running around at the next war!

Echoes.

Aesthetic Awesomeness

On behalf of the SNW Admin Team
I’d like to welcome you all to the first day of the 2013 SNW season

Sydney Nerf Wars

What better way to start the 2013 season, than with an aesthetic overhaul of your nerf blasters. Our very own John Pham, has quite the knack for awesome paint jobs on his blasters. He has agreed to share his knowledge, to help all of you delve into the great unknown realm of Aesthetic Awesomeness!

Let us begin

Things you will need:

  • Masking Tape
  • Sand Paper – 150 Grit (A relatively fine grain sandpaper)
  • Paints – You have the choice of several different types here, all with their own strengths and weaknesses
    • Vinyl Dye – The best looking paint type, but is also the most expensive paint type
    • Enamel Paints – Oil based paints that are cheap and easy to use, they dry as a glossy finish
    • Acrylic Paints – Water based paints that are also relatively cheap and easy to use, they dry to a matte finish
  • Primer – An undercoat layer, that helps the paint bond to the surface you’re spraying
  • Clear Coat – The final coat on your aesthetic overhaul. It’s a lacquer that goes over the paint coats, to seal them in.

How to prepare your blaster:

  1. If you are painting the whole blaster, skip to the step 2. Begin the preparation process, by taping up the parts of the blaster that you are not going to paint.
  2. Next thing to do, is to begin sanding it down lightly. Try not to sand too hard, as this will cause unsightly scratches and other undesirable marks.
  3. Sand smoothly and evenly, across every surface that you want painted.
  4. Once you are suitably happy with the sanding job, you will need to then wash the blaster. Carefully wash away the excess dust and plastic fibres that you have roughed up.
  5. Dry your blaster off, it should now feel slightly coarse (furry if you like)

How to paint your blaster:

  1. Start by applying thin layers of your primer (Base Coat), ensuring smooth and consistent layers. Thin layers are always best, because they dry quicker and do not bubble/dribble
  2. Slowly and methodically apply several thin layers of primer, using a fluent back and forth motion evenly across the blaster  (Allowing the coats to dry, before applying another).
  3. Once your primer is layered and dried out, you can now begin doing the same with your chosen paints.
  4. Apply several thin coats of your chosen paint (again waiting for it to dry in between coats), until you have reached a desired colour and coat thickness.
  5. Once you have completed both your primer and your coloured paint coats, allow the whole thing to dry suitably (this can take anywhere between hours-days, depending on the thickness of your layers and paint types used)
  6. Your blaster is now ready for its final coat (Clear Coat). You will want to follow the same steps and styling as above, several thin coats of clear coat. This is the most important part, as this step will seal your hard work in (helping to prevent scratches and marks)

In conclusion:

You should now have a basic understanding of how to prepare/paint your blaster, and be well on your way to making your own colourful arsenal. While this was just a basic run through on painting procedures, there is much more details and tricks that can be applied. Never limit yourself to what you think you are capable of, always try to push the boundaries and experiment in something new!

Pham

Credits:
Thank you John Pham for your helpful insight, into the world of aesthetic overhauling!

Dart Tag Snapfire 8 Modification Write up

Goals and aims

The aim of this modification is to increase the performances of the Snapfire to attain ranges of approximately 40ft flat. 40ft flat was chosen because it is the limit available to Semi-Automatic Pistols as per the rules of Foam Fortress: Sydney.

Tools required

  • Philips head screwdriver
  • Diagonal Cutters
  • Needle nose pliers

Modification Guide

Step 1. Disassembling the Snapfire

There are two main parts to this step: The first is removing all the screws in the yellow cover, and then removing that yellow cover itself.

Get a load of those external internals!

Now take that grey piece out of the other half of the yellow cover.

And here we see a Snapfire in all its awkward looking shame!

Step 2. Opening the Snapfire internal shell

Same drill as last time: take out all of the screws in the internal shell to reveal the plunger tube, rotating mechanism and all.

It took two attempts to open her up, but we did it.

Take note of how all the internals line up here. It’s important because this thing was actually slightly troublesome to get back together.

Step 3. Removing the Air Restrictor

Now that we’ve got the shell open, you can take some of the internals out of the shell. Begin by removing the turret and placing it to the side for now (we’ll deal with that later!). Now take out the Plunger Tube, hopefully without knocking any of the other internals out of place. If you did knock some out of place, that’s fine. Just refer to the internals picture above for a reference point of how to put everything back in place correctly.

This is the piece we want! The big orange thing just in case you weren’t sure.

Upon inspection of the plunger tube, you’ll notice the Air Restrictor sticking out the end. We need to get rid of this, and fast!

Turn your plunger tube the other way around so you’re looking at it like in the picture below.

The Air Restrictor’s rear end

Use your diagonal cutters to snip the thin plastic ring and prongs. Then take your set of needle nosed pliers and yank them out. Then continue with your needle nosed pliers and break the rest of the Air Restrictor apart if it hasn’t completely come out yet. It should look like this afterwards:

Now we can see right through it!

Be sure to use your pliers to pull off any of the excess plastic pieces left over where your Air Restrictor was. These can potentially get in the way of your turret rotation, which isn’t in your Snapfire’s best interests.

Step 4. Removing the Dart Posts

Now it’s time to pay attention to the turret. Grab your turret and look at the back of it as per the picture below:

Ignore the fact I’ve started removing the barrel posts already. But this is exactly what you want to do!

Now take your needle nosed pliers and just PULL the dart posts out from the back. After you’re done, it’ll look like this:

So now we can see all the way through the turret as well!

Be sure to use your pliers to pull off any excess plastic bits that might get in the way of your Snapfire’s rotation as well.

Step 5. Reassembling your Snapfire

Now this was a step that I had some trouble with. The shell seemed to be very resistant to going back together. But with a lot of perseverance, it finally gave in. This part of the guide will show you what to look out for when reassembling your Snapfire.

First of all, you’ll want to replace your plunger tube back into the shell. The plunger head should fit inside of it. After replacing it, your Snapfire should look like this:

Plunger tube back in

Take note of the area highlighted by the blue box. This was one of the problem areas that refused to let the other side of the grey casing to fit back on top. It was the silver pin in particular. I found that just straight up forcing the case back together would work well enough, so long as everything else was lined up. But don’t do this until you have your turret back in place!

To put your turret back in place, you’ll need to align the rotating mechanisms back up. Refer to the pictures below:

These two parts fit into each other

Take note of the areas highlighted by the blue boxes. They fit into each other perfectly. Push them together and make sure your turret appears like how it did in the original internals picture that I told you to take note of.

Now screw the Snapfire back together!

Fits nicely together!

And there you have it. Your AR removed Snapfire is complete!

Final Thoughts

Overall, the difficulty level of this modification was quite low. I think modders of any skill level will be able to attempt and successfully complete this modification.

At this point, I’ve yet to determine what the actual ranges of this modified blaster is, but I believe it’s very close to the target 40ft flat. A firing video will be up soon.

Further modifications to the airseal (both plunger to turret and plunger head to plunger tube) aren’t necessary.I think the stock seals are more than adequate. Replacing the spring is not advised, as it will very likely make the trigger pull much, much harder than it already is.

One problem that I’ve found is that it’s very easy to push the darts too far into the turret, which will end up fouling the rotation. To prevent this, I’m considering using small brass inserts in the back of the turret that would block the darts from being pushed too far back.

Anyway, thanks for reading. Like, comment, follow!

Echoes.

Sydney Nerf Wars Modification Write ups Competition!

Hello Nerfers! Since the beginning of this group, our community has been quite strong in the warring department. Our numbers at events have remained reasonably solid over time. While this is all well and good, we’re missing a certain something that every Nerf community needs: Documented Modification write ups. Not only do they allow members to showcase the skills of their trade, but they also create an informational resource for the younger and/or less experienced members to look at and learn from. But how, will we do this?

Today, we are announcing the opening of the Sydney Nerf Wars Modification Write Ups competition!

Keep reading to find out more!

Continue reading “Sydney Nerf Wars Modification Write ups Competition!”

LiPo Batteries – I’m Chargin’ Mah Nerfz0rz!

Hello Nerfers! I’m here today to tell you about the wonders of Lithium Polymer batteries!

LiPo’s have a bad rap in our hobby due to perceived dangers of their usage – the manufacturing process of these power cells means they must be treated with care, but by following instructions and taking the right precautions, they are no more dangerous than that set of AA’s you have decomposing in a TV remote in your own living room!

What is a LiPO Battery?

According to wikipedia, a LiPo battery is this:

“Lithium-ion polymer batteries, polymer lithium ion, or more commonly lithium polymer batteries (abbreviated Li-poly, Li-Pol, LiPo, LIP, PLI or LiP) are rechargeable (secondary cell) batteries. LiPo batteries are usually composed of several identical secondary cells in parallel to increase the discharge current capability, and are often available in series “packs” to increase the total available voltage.”

Does that clear up everything? No? Oh, alright then… better keep reading!

Continue reading “LiPo Batteries – I’m Chargin’ Mah Nerfz0rz!”

Sydney Nerf © 2024 Developed by Queenie