Goals and aims
The aim of this modification is to increase the performances of the Snapfire to attain ranges of approximately 40ft flat. 40ft flat was chosen because it is the limit available to Semi-Automatic Pistols as per the rules of Foam Fortress: Sydney.
Tools required
- Philips head screwdriver
- Diagonal Cutters
- Needle nose pliers
Modification Guide
Step 1. Disassembling the Snapfire
There are two main parts to this step: The first is removing all the screws in the yellow cover, and then removing that yellow cover itself.
 Get a load of those external internals!
Now take that grey piece out of the other half of the yellow cover.
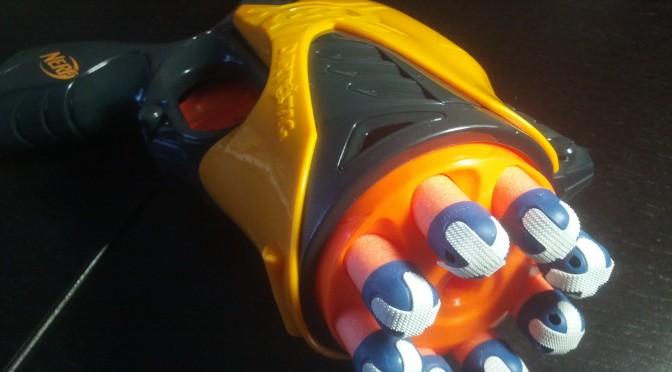
 And here we see a Snapfire in all its awkward looking shame!
Step 2. Opening the Snapfire internal shell
Same drill as last time: take out all of the screws in the internal shell to reveal the plunger tube, rotating mechanism and all.
 It took two attempts to open her up, but we did it.
Take note of how all the internals line up here. It’s important because this thing was actually slightly troublesome to get back together.
Step 3. Removing the Air Restrictor
Now that we’ve got the shell open, you can take some of the internals out of the shell. Begin by removing the turret and placing it to the side for now (we’ll deal with that later!). Now take out the Plunger Tube, hopefully without knocking any of the other internals out of place. If you did knock some out of place, that’s fine. Just refer to the internals picture above for a reference point of how to put everything back in place correctly.
 This is the piece we want! The big orange thing just in case you weren’t sure.
Upon inspection of the plunger tube, you’ll notice the Air Restrictor sticking out the end. We need to get rid of this, and fast!
Turn your plunger tube the other way around so you’re looking at it like in the picture below.
 The Air Restrictor’s rear end
Use your diagonal cutters to snip the thin plastic ring and prongs. Then take your set of needle nosed pliers and yank them out. Then continue with your needle nosed pliers and break the rest of the Air Restrictor apart if it hasn’t completely come out yet. It should look like this afterwards:
 Now we can see right through it!
Be sure to use your pliers to pull off any of the excess plastic pieces left over where your Air Restrictor was. These can potentially get in the way of your turret rotation, which isn’t in your Snapfire’s best interests.
Step 4. Removing the Dart Posts
Now it’s time to pay attention to the turret. Grab your turret and look at the back of it as per the picture below:
 Ignore the fact I’ve started removing the barrel posts already. But this is exactly what you want to do!
Now take your needle nosed pliers and just PULL the dart posts out from the back. After you’re done, it’ll look like this:
 So now we can see all the way through the turret as well!
Be sure to use your pliers to pull off any excess plastic bits that might get in the way of your Snapfire’s rotation as well.
Step 5. Reassembling your Snapfire
Now this was a step that I had some trouble with. The shell seemed to be very resistant to going back together. But with a lot of perseverance, it finally gave in. This part of the guide will show you what to look out for when reassembling your Snapfire.
First of all, you’ll want to replace your plunger tube back into the shell. The plunger head should fit inside of it. After replacing it, your Snapfire should look like this:
 Plunger tube back in
Take note of the area highlighted by the blue box. This was one of the problem areas that refused to let the other side of the grey casing to fit back on top. It was the silver pin in particular. I found that just straight up forcing the case back together would work well enough, so long as everything else was lined up. But don’t do this until you have your turret back in place!
To put your turret back in place, you’ll need to align the rotating mechanisms back up. Refer to the pictures below:

 These two parts fit into each other
Take note of the areas highlighted by the blue boxes. They fit into each other perfectly. Push them together and make sure your turret appears like how it did in the original internals picture that I told you to take note of.
Now screw the Snapfire back together!
 Fits nicely together!
And there you have it. Your AR removed Snapfire is complete!

Final Thoughts
Overall, the difficulty level of this modification was quite low. I think modders of any skill level will be able to attempt and successfully complete this modification.
At this point, I’ve yet to determine what the actual ranges of this modified blaster is, but I believe it’s very close to the target 40ft flat. A firing video will be up soon.
Further modifications to the airseal (both plunger to turret and plunger head to plunger tube) aren’t necessary.I think the stock seals are more than adequate. Replacing the spring is not advised, as it will very likely make the trigger pull much, much harder than it already is.
One problem that I’ve found is that it’s very easy to push the darts too far into the turret, which will end up fouling the rotation. To prevent this, I’m considering using small brass inserts in the back of the turret that would block the darts from being pushed too far back.
Anyway, thanks for reading. Like, comment, follow!
Echoes.